CNC Grinding Wheel Dresser GC-X6
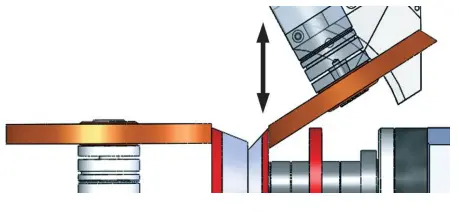
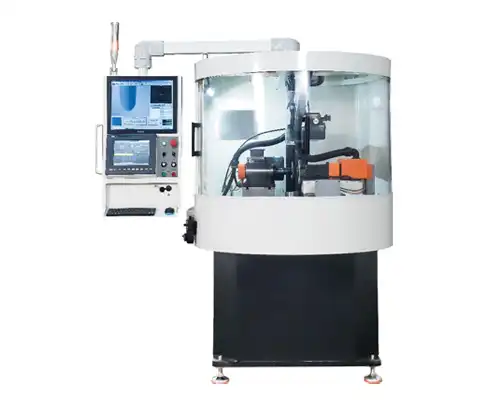
UNI-X6 is a five-axis CNC grinding wheel dresser, which is specially used for precision shape dressing of diamond or CBN grinding wheel used in CNC grinding machine. It can work on the inner side surface, outer peripheral surface, outer side surface, angle surface and arc of the grinding wheel into consistent dimensions in a stable and reliable manner.
Send InquiryQuotation
|
Model No. |
Commodities name |
Quantity (set) |
Unit price (RMB) |
Remark (RMB) |
|
UNI-X6
|
Five-Axis CNC Grinding Wheel Dresser |
1 |
650000 |
|
|
Payment term: |
EXW Shanghai, 50% deposit, 50% before shipment |
|||
|
Lead time: |
30 working-days, Within 30-40 days after received prepayment |
|||
|
Package : |
Inner with waterproof plastic bag, outer with plywood case |
|||
|
Training: |
The machine training is not include, will be discussed separately. Notice: This quotation is in validity of 30 days |
|||
I. Technical Description
1. System Overview
1.1 UNI-X6 is a five-axis CNC grinding wheel dresser, which is specially used for precision shape dressing of diamond or CBN grinding wheel used in CNC grinding machine.
1.2 It can work on the inner side surface, outer peripheral surface, outer side surface, angle surface and arc of the grinding wheel into consistent dimensions in a stable and reliable manner.

1.3 UNI-X6 is equipped with a standard video measuring system with measuring and saving functions. As standard, it is configured with a variable-magnification lens, which, along with the camera, is protected by a transparent acrylic cover. If requested by customers for special working conditions, special lens and higher-resolution cameras can be optionally configured as needed.
1.4 The spindle of the diamond or CBN grinding wheel to be dressed is installed on a cross-shaped slide table. During the dressing, straight lines and arcs can be drawn on the software interface, or the drawings in .dxf format can be imported to the measurement software for comparison, or the deviation of the dimensions of grinding wheel after dressing from the theoretical curve can be measured.
1.5 The measurement software can preset some common grinding wheel graphics, which can be called and edited.
1.6 After tool setting with the measurement software, SIC grinding wheel parts rotate automatically, feed back and forth, feed in automatically and correct automatically by numerical control. The rotation servo angle of C axis and feed servo position of Z axis of SIC grinding wheel are both displayed on the numerical control system.
1.7 Dressing mode: auto mode combined with manual mode.
1.8 The dresser is equipped with a sealed hood and can work in a dry, water mist or wet condition. The thickened hood sheet metal and 10 mm thick acrylic arc door make this machine meet the requirements for functionality, safety and environmental protection.
1.9 It is also equipped with a suction inlet and grinding fluid return port, and optionally configured with a dust collector and grinding fluid filter.
II. Technical Parameters
|
Spindle of grinding wheel to be dressed |
BT40 interface spindle as standard, or customer interface spindle as optional. |
|
Dressing mode |
Dry, water mist or wet |
|
Dust collector and grinding fluid filter |
Optional |
|
Power supply voltage |
Three-phase 380 V/50 Hz |
|
Power |
3 kVA |
|
Maximum diameter of grinding wheel to be dressed |
Ф300 mm (can be customized if the diameter is greater than this) |
|
Minimum diameter of grinding wheel to be dressed |
Ф30 mm (can be customized if the diameter is smaller than this) |
|
Maximum width of grinding wheel to be dressed |
40 mm (can be customized if the width is greater than this) |
|
Speed of grinding wheel to be dressed |
50-1000 rpm (stepless speed change) |
|
Displacement of grinding wheel to be dressed along X axis |
135 mm (which can be increased to 300 mm by moving the base of grinding wheel spindle) |
|
Displacement of grinding wheel to be dressed along Y axis |
100 mm |
|
Outside diameter * thickness * inside diameter of grinding wheel (SiC) |
Ф200 x 10 x Ø31.75 mm |
|
Speed of grinding wheel (SiC) |
Max 2,800 rpm (stepless speed change) |
|
Number of swings of grinding wheel (SiC) |
0-60Hz (stepless speed change) |
|
Length of swing of grinding wheel (SiC) |
0-50 mm (adjustable) |
|
Resolution of numerical control axis |
0.001 mm/0.01° |
|
CCD and lens |
As standard |
|
Upper light |
LED |
|
Backlight |
LED |
|
Computer host and LCD |
One set |
|
Computer measurement system |
One set |
|
Enlargement ratio |
20-100 as standard |
|
Measurement function |
It can enlarge the real image and CAD drawing in step for visual line pressing comparison |
|
Data display |
The position of the grinding wheel to be dressed read on the grating scale can be displayed on the measurement software |
III. System Configuration
3.1 A high-precision and high-rigidity mechanical spindle with an outside diameter of 80 mm and an ISO BT40 inner cone is used as the diamond spindle. According to different types of grinding wheel flanges of customers, different types of adapters can be used, and customers can also directly choose the φ80 spindle with custom interface.
3.2 An on-line grinding wheel measuring system with 19-inch LCD is configured, with the numerical control system, light source controller and control buttons are at the bottom of the display. The measurement software can enlarge the real images and CAD drawings in step for comparison, and measure the actual deviation. It can measure the dimensions of the grinding wheel or calculate the dressing margin for the operator. In addition to such basic measuring functions as points, lines and arcs, the measurement software also allows the import of CAD drawings in DXF format. The measurement software can preset some common grinding wheel graphics, which can be called and edited.
3.3 Dressing and measuring range of grinding wheel: 30-300 mm (diameter), 1-40 mm (thickness).
3.4 The position reading of the grinding wheel to be dressed can be displayed on the measurement software in the form of X/Y axis value.
3.5 The rotation servo angle of C axis and feed-in servo position of Z axis can be displayed on the numerical control system.
3.6 The high-resolution and high-definition lens is used, which, along with the camera, are protected by a transparent protective cover from being contaminated by the grinding wheel dust generated during dressing.
3.7 Two LED light sources are provided, of which the brightness can be adjusted independently.
3.8 The large-diameter backlight technology is integrated, making the grinding wheel images clearer and more accurate.
3.9 A sealed hood is provided, making it possible for the dresser to work under dry, water mist or wet condition, and meet the requirements for functionality, safety and environmental protection. Customers can opt to configure a dust collector and grinding fluid filter.
3.10 The five-axis CNC system controls two numerical control cross feed units and the C axis (rotating numerical control axis).
X axis: with a resolution of 0.001 mm, a stroke of 130 mm (which can be increased to 300 mm by moving the base of grinding wheel spindle)
Y axis: with a resolution of 0.001 mm and a stroke 100 mm
Z axis: with a resolution of 0.001 mm and a stroke 100 mm
V axis: swing axis with a stroke of 50 mm
C axis: with a resolution of 0.001°, a positioning accuracy of 45", and a repeated positioning accuracy of +/-5".
3.11 During automatic dressing, the feed-in can also be manually controlled with the electronic handwheel.
3.12 The linear CNC axis is configured with imported ball screw and servo motor, and the rotating CNC axis is configured with CNC index plate.
3.13 The spindle of the grinding wheel group to be dressed is driven by an AC variable frequency motor, and the spindle of the SiC grinding wheel to be dressed is driven by a smaller DC brushless motor.
IV. Instructions for Use
4.1 During the dressing of grinding wheel, manually adjust the X/Y axis with the electronic handwheel to move the grinding wheel to the original grinding starting point. At the cross intersection position on the measuring interface, manually adjust the position of grinding wheel and start trial operation, and observe and adjust the relative positions of the SiC grinding wheel and the grinding wheel being dressed on the display.
4.2 Determine the dressing quantity according to the wear of grinding wheel, and operate the grinding wheel dressing program according to the dressing parameters.
4.3 Choose a line or an arc dressing program to realize CNC automatic line or arc dressing.
4.4 For a group of grinding wheels, select the next grinding wheel and the surface to be dressed, and continue the above cycle until the whole group of grinding wheels are all dressed.
4.5 It is recommended to check the runout, dynamic balance and dimensions of the grinding wheels having been dressed before recording the data.
4.6 Detect and record the diamond abrasive state on the surface of grinding wheels having been dressed with the measuring system, to ensure that each grinding wheel is in the optimal working condition and that enough information is available as the basis for selecting a more reasonable grinding wheel.
V. Technical Training and Service
5.1 The seller will send engineers to the buyer's site to install, commission and test run the CNC grinding wheel dresser.
5.2 The seller will provide quality guarantee service for 12 months, starting from the date of acceptance. In case of any damage not for the buyer's reason within the warranty period, the seller will replace the damaged parts at its own cost.
5.3 Upon expiration of the warranty period, the seller will charge the buyer for any maintenance service for the CNC grinding wheel dresser.
5.4 The seller's service engineer will arrive at the buyer's site to provide technical service within 72 hours after receiving the buyer's service request.
VI. Acceptance
6.1 Acceptance criteria: according to the contract appendix, the seller shall provide at most three pieces of grinding wheel drawings.
6.2 Acceptance report
The final acceptance of the CNC grinding wheel dresser shall be carried out within one week after it is installed and commissioned. The acceptance report shall include the dresser inspection report, packing list, technical agreement and the inspection report of grinding wheels dressed according to the contract appendix. Then the two parties shall hand over the machine and carry out the acceptance.


